
Adjustment of the optimal timbre of the vocals
Whether it's a human voice, a song, or the sound of an instrument, it's not a single tone, b...
Read moreAt present, most of the professional audio used in domestic dance halls is imported equipment, which should be said to be highly reliable. The main problem is that the professional quality of the operators is uneven, and there are very few units that are really equipped with qualified tuners. Therefore, it often occurs that the sound effect is poor due to improper operation, and even damage to the equipment. This article explains the key points of audio equipment in small and medium-sized cabaret halls, which can be used as a reference for formulating operating procedures. In addition, in small and medium-sized dance halls, the phenomenon of self-excited whistling caused by microphone sound feedback is a common headache for users, because frequent whistling will disappoint the guests, and the sound effect cannot be discussed, and in severe cases, it will cause equipment damage. Therefore, the phenomenon of self-excited screaming is an important problem in the use of sound in dance halls, which are described separately below.
1. The order of turning on and off the audio equipment
It should be turned on in the order from front to back, that is, from the sound source equipment (CD player, LD player, DVD player, tape recorder, video recorder), audio processing equipment (voltage limiter, exciter, effector, crossover, equalizer, etc.) to the audio power amplifier to TV, projector, monitor. When turning off, the order is reversed, and the amplifier should be turned off first. This operation prevents the impact of the power on and off on the equipment and prevents the amplifier and speakers from being burned.
2. Preparation before singing - debugging
1. The volume control potentiometer of the amplifier is always adjusted to the maximum position; The accompaniment music and microphone splitter fader on the mixing table should be set at 0dB; The input gain of each branch GAIN on the mixer is placed in the tuned position; The mixer total volume fader is placed in the smallest position (lower end) first; The mixer sound quality compensation knobs are all placed in the middle position.
2. Test the accompaniment channel, that is, use a CD disk or LD disk to play the song music, and put the mixer to the point of -6dB, when the singing and accompaniment music are roughly the volume of normal operation; However, it should be noted that the volume should be moderately pleasant, and too loud can easily make people tired and unbearable. The tuner should go to different places in the hall to listen to the effect. Such as stereo image, music quality, etc. The tracks played should be familiar to you, and the volume can be adjusted repeatedly (adjusting the splitter gain and splitting sound quality compensation) until the sound effect is satisfactory. The requirements for the musical effect should be strong and beautiful, the treble should not be harsh, the bass should not be muddy, and the singing voice should be clear, such as the sibilant sound of the female voice can be heard clearly. But don't be too heavy. The split fader is set at 0dB, the total volume fader is set at 0dB, and the AU meter is adjusted to indicate about 0dB when the AU meter is adjusted to indicate about 0dB, and the system reaches the rated output power. However, when working normally, the total volume fader-general adjustment is below -6dB or -10dB, which is less than the rated output power.
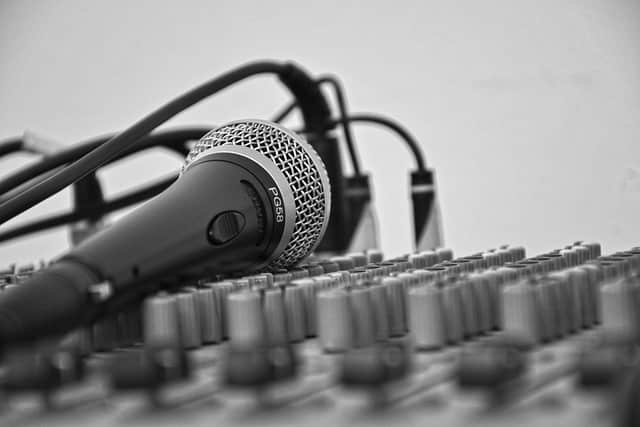
3. Test the microphone channel. In general, at least two microphone channels should be prepared. First test the sensitivity and dynamic performance of the microphone, and then add reverb and accompaniment music to sing, the singing voice is reverberated, which should be more rounded, full, layered than the original song's tone, and full of scene. Microphone volume adjustment: The splitter fader is set at 0dB, the microphone volume adjustment is the breakout GAIN input gain button, and the breakout peak level indicator is occasionally flashing, and the total output power is measured by the AU meter.
4. Adjust the sound check of the small band, that is, the microphone raising and electrical signals of various musical instruments should be checked, and the sound ratio should be balanced according to the style of the music.
5. Adjustment of video images, that is, projectors and color TVs should make their images clear and colorful by adjusting their brightness, contrast, color saturation and other knobs. The sound technician should be proficient in using DVD players and clickers, and be familiar with the plates on the ordering list. Note that when singing officially, you should press the D/A key on the DVD player. Erase the original singing voice.
3. Adjustment of audio processing equipment
1. Room equalizer. The room equalizer has two functions, one is to adjust the sound quality and make up for the frequency response imbalance caused by the reverberation time in the hall; Another important role is to suppress a certain frequency band and suppress the whistling sound caused by acoustic feedback. The room equalizer should maintain the position adjusted during the commissioning of the audio project.
2. Pressure limiter. In audio engineering, the voltage limiter is also an important equipment, and its functions are: first, to compress or limit the dynamic range of the program, prevent overload or distortion, and have a protective effect on the amplifier and speaker; Another important role is to increase the loudness of the program (which can be clearly felt by hearing).
The adjustment data of the pressure limiter is as follows: (1) Noise gate GATE: When the indicator light is on, the noise gate is closed, and the sound is low. It plays a role in squelching. It starts to close when the input signal drops to the threshold level, and the noise gate is generally placed between 0 PEN and -20dB. (2) Compression threshold level THRESHOLD: Determines the level at which the compression begins, generally set to -10 to 0dB, when the gain decreases when the compression begins, the GAIN REDUOTION (dB) indicator light begins to light up. (3) Compression ratio RATT0: set at 2:1; (4) Action time ATTACK: set to 10ms; (5) RELEASE: Set in O.3s.
3. Reverberator. Digital reverberators are widely used today. These machines have many different reverberation effects cured internally to choose from. The tuner should try and listen to the various reverberation effects of the reverberator used one by one, record the programs that can be used, and use the keyboard on the machine at any time when tuning.
4. Tuning points (mainly to operate the mixer)
1. The karaoke hall tuner works in the control room, and should use monitoring speakers and monitoring headphones when tuning, and monitor the main channel and listening back channel respectively. The tuner should be familiar with the relationship between monitor and live sound, and the adjustment of sound quality largely depends on the individual's sense of hearing.
2. Use a voltage limiter and exciter to increase the loudness and beauty of the sound. The adjustment of the exciter mainly depends on hearing, and the sound should be adjusted according to the equipment instruction manual.
3. Beautify the singing with reverberation. For non-professional singers, the reverberation should be appropriately increased to cover up the defects in noise and vocalization.
4. When the volume is small, pay attention to increasing the low and high frequencies; When the volume is high, the midrange is appropriately increased to enhance the brightness of the sound.
5. Tuning is mainly based on singing. When the singing appears, the accompaniment is gradually lowered to highlight the singing. The low frequency should be attenuated by 3-5dB, the high frequency above 7kHz should be attenuated by 3dB, the medium and low frequencies can be increased around 200Hz, and the singing voice can be clearly felt by 3-6dB by increasing 2-4kHz. For disco or rock music, pay attention to greatly increasing the low frequency (40-100Hz) and high frequency (7-20KHz).
6. When raising the bass, do not turn the compensation button violently to avoid damage to the amplifier and speakers due to excessive power output. The same is required for the low-frequency adjustment of the equalizer.
7. If the sound feedback whistling occurs, the total volume fader of the predicate should be quickly pulled down to remove the whistling sound, and then gradually push it up after finding out the cause.
8. When the main channel fails and cannot be broadcast, the rotation angle of the listening speaker can be temporarily replaced by the main channel so that the singing can continue. Microphones for singing should have backups, which can be replaced when the microphone is silent. The DVD drive should also have a backup, which can be replaced when the DVD drive fails.
5. Suppression of acoustic feedback (whistling).
1. The self-excited whistling sound caused by microphone sound feedback is a common phenomenon in karaoke halls and karaoke 0K halls, and due to the existence of acoustic feedback, the gain of the general amplification system cannot be very large. The reasons for the sound feedback whistling are: (1) the microphone is too close to the speaker, and the microphone is pointing directly at the speaker; (2) The reverberation adjustment on the mixing console is too large; (3) The microphone volume adjustment is too large; (4) The voltage limiter is not connected; (5) Defects in the acoustic design of the hall.
2.To address the above issues, the following measures can be taken: (1) Define a general area for the singer's stage, within which feedback should not occur. That is, the singer should not be too close to the main speakers, and the main speakers should be symmetrically positioned on both sides of the stage; the singer's position should not allow the microphone to point directly at the speakers. (2) The stage of the karaoke room should be acoustically treated, and sound-absorbing materials should be installed on the walls and sides. (3) Turn on the compressor limiter, and set its compression ratio to <= 2:1, action time to 10ms, and release time to 0.3s. (4) Do not turn the reverb adjustment and volume on the mixing console too high. (5) If the above measures are ineffective, the frequency that is prone to feedback can be attenuated by adjusting the equalizer. The specific operation method is as follows: First, record the position of each frequency point of the equalizer; then, demonstrate. Increase the volume (using the main fader on the mixing console) until the system just begins to self-oscillate. Then, gradually lower the equalizer knobs starting from the low frequencies. This can effectively eliminate the self-oscillation feedback frequencies. Based on experience, there is usually only one self-oscillation resonant frequency (e.g., 250Hz). The frequency range can be lowered by 3-5dB, while the other frequencies should remain at their original recorded positions. This method can effectively suppress acoustic feedback, but it cannot maintain the musical effect. By adjusting, a stable margin of 5-6dB can be achieved in the amplification gain, which is necessary for the stable operation of the system. (6) If the above measures still do not work, consider adding the operating points of a professional audio engineer.
Whether it's a human voice, a song, or the sound of an instrument, it's not a single tone, b...
Read more
When designing and installing an audio system, the matching of amplifiers and speakers is an...
Read more
Club equalizers typically require a pink noise generator and a real-time spectrum analyzer f...
Read more
Currently, most professional sound systems used in domestic dance halls are imported equipme...
Read more
1. Hip-hop originated from Black culture. It's a laid-back and elegant form of music, named ...
Read more
As the year draws to a close, China's consumer goods export market, which should be bustling...
Read more